How To Screen Capture on Windows 7
Windows 7 is one of the best operating systems that Microsoft ever worked on. After a big failure of Windows Vista, Microsoft had to pick themselves up and do something to get back to being what they are i.e. a company that makes operating system and software that allow common people to be able to use a PC.
Windows 7 came with a whole new look and feel and it was amazing to see the Windows Aero theme on our laptops and desktops. Not only looks, but Windows 7 was great in the features department as well. It came with many improved features and security options that people absolutely loved. Microsoft had fixed all the issues that occurred on Windows Vista, and hence, Windows 7 became a public’s favorite, and this was the first time it was happening after Windows XP. Even to this day i.e. 2015, people are still not willing to switch from Windows 7 as it is one of the best-operating systems Microsoft worked on.
I had to make some tutorials on Windows 7 and hence I was looking for a good software that allowed me to record the screen on Windows 7 and after a lot of searching, I found the best screen recorder for Windows 7.
In this post I am going to tell you how to perform a screen capture on Windows 7 and to do this, we are going to use the software named Movavi Screen Capture Studio. This software allows you to capture your screen in a video, and this works extremely well with Windows 7. Let’s get started with the tutorial.
How to record screen on Windows 7?
As I mentioned before in this post, we are going to use a software named Movavi Screen Capture Studio, which will allow you to capture easily screen on Windows 7.
How to download, install and use Movavi Screen Capture Studio?
Download & Install Movavi Screen Capture Studio
- Just head over to Movavi website and click the download button in order to download the setup file for the software.
- You will see that an exe file will be downloaded from the page.
- Now all you need to do is double click the downloaded exe setup file and the setup will start in no time.
- Now choose the appropriate options and install the software using suitable options and the installation will be completed in no time.
Using Movavi Screen Capture Studio
- After the downloading and installation is complete, you can just start the program that you just installed.
- You will see a window similar to the image we have attached below.
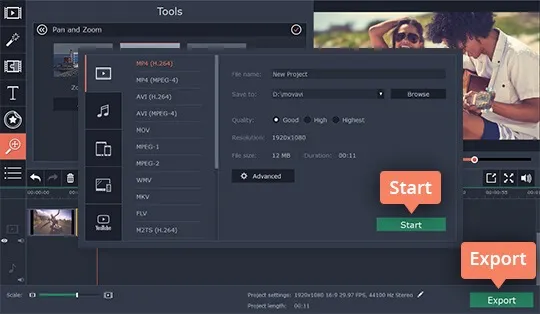
- All you need to do now is set the recording area as well as resolution from the list of presets. You can also choose to do custom size recording.
- You will see the options for recording your system audio or audio from an external mic as well.
- Now that everything has been setup, all you need to do is hit that REC button and the recording will start.
The Movavi Screen Capture Studio allows you to edit the video after recording and hence this is the only software you will need to record and edit all the screencasts on Windows 7.

Comments